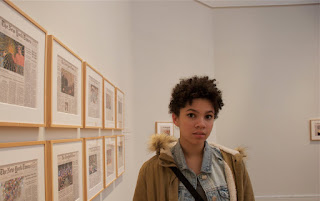
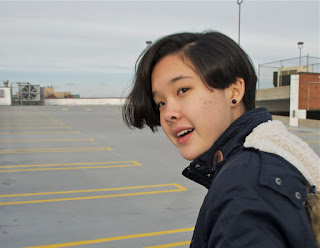
Portrait Photography is a booming industry. In order to do it well one needs to connect with their client and create a snapshot of that moment.
Most Fine Art Portraits are headshots (the shoulder up). Your portraits will be HEADSHOTS.
The FOUR main things to pay attention to when taking portraits is:
1. The lighting (always natural)
2. The background behind the person (no distractions)
3. The angle the face is at (tip down and slightly to the side).
4. Your subjects eyes. Make sure there is light on them.
Hint: Friday's Questions.
For the Portrait Project you will will add to your Visual Ethnography (story about you through pictures) by choosing 5 people that mean something to you and take their pictures in a way that captures their essence. For each person you will position them in a way where natural light highlights their face.
The Photoshop applications you will use for this project is the Adjustments (brightness/contrast, curves and exposure) and you will covert images to Black and White.
Many resources are out there for taking Fine Art Portraits. Below you will find tutorials, articles and links to Portrait Photographers sites to get inspired.
Please check out the following Portrait Photographers: Sue Bryce, Ameen Howrani, Richard Avedon, Steve McCurry, Bill Owens, Mary Ellen Mark, Carrie Mae Weems, Jan Meissner, Cass Bird, Annie Leibovitz, Peter Turnley, Gabi Ben Avrahahn, Diane Arbus, Brandon Stanton, Gordon Parks, Coreen Simpson, Shirin Neshat, Luis Garvan and Cristina Hoch.
Surreal of Fantasy Photographers to look at are Alex Stoddard, Brooke Shaden, Kyle Thompson, Logan Zilmer, Yutha Yamanake and Alessio Albi.
Another inspiration is the work of a 15 year old David. You can see his work here: https://www.huffingtonpost.com/2014/09/19/david-uzochukwu-photography_n_5843864.html
Another great place to get inspired for portrait is looking at the images in the article Portraiture Photography By Famous Photographers.
You will choose 2 of your best photos of each person. You will have 10 images that you will need to edit with Adjustments (curves, exposure, brightness and contrast, and levels). For each set of 2 different images per person you will choose 1 to make black and white. On your weebly portfolio you will post 2 different images per person, both edited- one in color and a different one in black and white.
Each image will have a title.
The Artist Statement for Portraits requirements is to write a story about ONE of the people or animals that you took a portrait of in 5 sentences. In no less than 3 sentences describe that person or animal and what they mean to you. Write 2 complete sentences about the environment in which you took the photos and how you arranged the best possible image. Use the vocabulary from Composition 101- rule of thirds, formal balance, informal balance, lighting, grouping (set up), selective focus, horizon line, leading lines and framing.
Turn-in
You will post a total of 10 images (see layout below). Title each set. Your new Weebly page should be titled Portraits and you will turn the new page url to Google Classroom for credit.
For Photopea.com you will do this for each of the ten images. Go to File- Open and select your image.
Crop if you need to. Remember to click on the check mark or click on the rectangular marquee if you get stuck.
Next you will go to Image- Adjustments and apply the following tools- Curves, Exposure, Brightness and Contrast, and Levels until you image looks crisp and details look sharp.
Once done with edit(s) you will assess the background to determine if it needs to be blurred. If so you will need to find the Lasso tool and outline what you need to blur.
Once the selection is made with the Lasso you need to go to Filter-Blur- Gaussian Blur and dial up the ration to about 20-30. Make sure it looks okay by previewing.
Next you will need to find the Dodge tool. This will allow you to brighten the eyes and whiten the teeth.
The Spot Healing tool is for blemishes and to take out hair or crumbs.
Remember to go to File- Export As- JPG and highest quality for your weebly.
For the second image which will be Black and White, you will need to do the same step as above. The only difference is when you are done, you will go back to Image- Adjustments- Black and White. You will need to Export as a JPG as well.
First open or launch Photoshop (PS). Next place your image by either going to File- Open or dragging your image to the PS icon in the dock. Once you have placed your image you will need to check the size (Image- Image Size) so that it is in the 8 inch by 10 inch range.
Next you will need to go to Window- Adjustments. And edit all your images using the Adjustments. Focus on using the Brightness/ Contrast, Curves and Exposure. You may try the other ones as well.
Once you have done the Brightness/ Contrast, Curves and Exposure adjustments you will see that it creates a new layer. Next click on the Black & White adjustment to create a B&W image.
Using Save As you will need to save your file as a PSD and JPEG (in format drop down) and to your desktop or Portrait Folder.
Again remember you will have 5 sets of images (2 different images per person with both edited and one B&W). All images will have titles and one person will have an Artist Statement.
Photographing People 2019 by Meredith Giltner on Scribd
Portrait Artist Statement by on Scribd


